Showing posts with label In the Kitchen. Show all posts

Tuesday, November 1, 2016

Easy Fluffy Gluten Free Chocolate Cupcakes


I had never made gluten free cupcakes before so I was curious how they would turn out when a friend asked me to make some. I knew I could make a good gluten free cupcake, I just wasn't sure if they would be up to par the first go around and decided to make time for a few test batches before committing to a recipe.

In my mind, I though of gluten free cake to be either flat or dry. I mean, unless you were a total GF pro, it had to be, right? I have to say I was pleasantly surprised.

I started by scouring Pinterest for recipes, taking note of any common techniques or ingredients among recipes. When making something new, I tend to gravitate toward more complex recipes because the extra work usually pays off. Baking is a science and sometimes skipping a seemingly unimportant step can take your finished product from amazing to just ok, or even a total fail. However, I found one recipe that peaked my interest. It was an easy, one bowl recipe but seemed to include ingredients that might fix the problems associated with GF baking and the author did a satisfactory job of explaining why this recipe worked just as well as the more complex ones did. With some minor modifications, I gave it a go and the puffiest, most beautiful chocolate cupcakes emerged from the oven on my first try. Can't beat that!

Then came the real test. I gave one to Jordan, I gave one to my brother, and I gave one to my dad and they all agreed that "Hey, these are pretty good!" Test passed.

I do have to say, they are not completely, 100% identical to regular cupcakes. The texture is ever so slightly different and they are just a little more dense than a classic cupcake; however, if you didn't say anything, no one would probably notice the difference.

These cupcakes are extremely chocolatey and are also less sweet than a regular cupcake - so dark chocolate lovers rejoice! If you love super sweet cake, feel free to adjust the sugar amount, but, with icing, I had no complaints, even from sugar lovers in the room.

-1 1/2 cup GF flour blend with xanthan gum in the ingredients  - I used Olivia's Outstanding Multi-Purpose Flour Mix (or add 3/4 teaspoon xanthun gum to a flour that doesn't already contain xanthun gum)
-1 cup baking cocoa 
-1 1/2 cup sugar
-1 teaspoon baking soda
-1/2 teaspoon salt
-1 cup hot water or coffee
-2/3 cup melted butter
-1/2 cup sour cream (or you can also use dairy free yogurt)
-3 eggs

  1. Preheat your oven to 325F, and prepare your pans. *tip: I usually preheat the oven to 350F and then reduce it to 325F when I put the cupcakes in the oven. This will usually give your cupcakes a higher rise.*
  2. In a large mixing bowl, whisk together the cocoa, brown sugar, flour blend, baking soda, and salt.
  3. Add the hot water and oil to the dry ingredients and THEN stir using a silicone/rubber spatula (if you stir in just the water, the batter will be very thick so when you try to stir in the oil it will take a long time and splash all over.)
  4. Stir in eggs and sour cream.
  5. Fill your prepared pans (For cupcakes, about ⅔ full. For layer cakes, evenly divide the batter between both pans). Bake until the cake springs back if gently touched, or a toothpick inserted near the center of the cake comes out mostly clean, with maybe a little crumb or two.
  6. Mini cupcakes should bake 15-20 minutes, regular cupcakes 20-25 minutes, and layer cakes or 9x13 cakes 30-35 minutes.
Recipe adapted from Flippin' Delicious

Still feel intimidated by gluten free baking? Try one of Emma's Mixes! She makes gluten free baking super easy. Click HERE to find out more about Emma and her delicious cookies and more!

Saturday, October 1, 2016

Popcorn with Coconut Oil and Honey


I've always loved popcorn. Popcorn's great because you can make it so many different ways: classic with salt and butter, sweet like caramel and kettle corn, savory like cheese, or even birthday cake flavored like I discovered this weekend! But my most favorite way to have popcorn is homemade with coconut oil and honey. I've even convinced non-popcorn eaters (Jordan) to love popcorn this way, so it's definitely worth a try.

1/3 cup unpopped popcorn
1 tablespoon butter
1 - 1 1/2 tablespoons coconut oil
A drizzle of honey
Salt to taste

I have an old fashioned air popper that I use to pop my popcorn, but you can also use a brown paper bag in the microwave by simply pouring some popcorn into the paper bag, folding the end to secure it, and microwaving for a couple of minutes or until you stop hearing popping for 3 - 5 seconds. If you choose to use a paper bag and the microwave, only pop about half the popcorn at a time - remember it grows!

After you pop your corn, melt the butter, coconut oil, and honey together in the microwave. Make sure to stir it because the honey will settle on the bottom. Pour the oil mixture over the popcorn in small portions, salting and stirring until the popcorn is evenly coated to your taste.


Monday, September 19, 2016

2 Ingedient Mug Cake


Saturday was a rainy day. Rainy days have a way of making me want to sleep all day, or at least have a cozy warm mug of something all day. Coffee? Tea? How about cake? You could even just have a mug of each. That sounds like a pretty cozy rainy day to me. Especially when this mug of cake is super fast and easy to make and will only make enough for a small treat without completely ruining your diet.
Here's how it's done:

3 tablespoons boxed cake mix (I like to use chocolate)
2 - 2 1/2 tablespoons milk of your choice
toppings or add-ins of your choice
A sturdy microwave safe mug (I do not recommend using a clear glass mug)

All you do is mix the cake mix and milk together in a microwave safe mug. It should be the consistency of normal cake batter. You can add anything you like - chocolate chips, nuts, sprinkles, etc. Microwave for about 1 minute and 45 seconds. The mug will be very hot so let it sit in the microwave for about 30 seconds before taking it out. Top it with ice cream, whipped cream, icing, chocolate syrup, anything you want!
This is not one of those recipes where the cake rises to the top of the mug and stays super fluffy. It will puff up while cooking but most likely fall back down a little so don't worry if it seems to go flat. It will still be fluffy, moist, and delicious!


Thursday, June 30, 2016

Flavored Lemonades


 One of my favorite summer drinks is lemonade. Lemonade is great because you can flavor it so many ways. Today I made four of my favorite flavors and my niece, Sylvia, was here to help! She tasted each flavor and commented on each one as she sipped. I had no idea she was such a connoisseur of lemonade - or "lemalade" as she calls it. I asked which one was her favorite flavor but she just couldn't decide so you can make some for yourself and decide which one you like best!

Lemonade Base

1 quart + 1 cup water
1/2 cup lemon juice
1/3 cup sugar
drizzle of honey (optional)


Lavender Lemonade

Lemonade base
1 tablespoon dried lavender buds

Mix 1 cup water, lavender buds, and sugar in a pot over medium heat. Stir until sugar dissolves and simmer for 5 minutes. Remove from heat and let the mixture cool slightly. Strain the lavender buds out before transferring to a pitcher and adding the remaining quart of water and lemon juice.

Notes from Sylvia: "This one tastes juicy! It's very juicy. I like it very much."


Ginger Lemonade

Lemonade base
1-2 inch piece fresh ginger root, sliced

Mix 1 cup water, sliced ginger, and sugar in a pot over medium heat. Stir until sugar dissolves and simmer for 5 minutes. Remove from heat and let the mixture cool slightly before transferring to a pitcher and adding the remaining quart of water and lemon juice.

Notes from Sylvia: "This one tastes like sour lemalade but it's sweet. I like it a lot!"


Mint Lemonade

Lemonade base
1 peppermint tea bag

Steep the mint tea bag in 1 cup hot water for 5 minutes. Add the sugar to the hot tea and stir until dissolved before adding the remaining quart of water and lemon juice.

Notes from Sylvia: "This one smells like a candy cane! It tastes like a candy cane! It tastes like a candy cane and lemalade"


Watermelon Lemonade

1 quart cold water
1 1/2 cup watermelon
1/2 cup lemon juice
1/4 cup sugar (optional)
5-7 fresh mint leaves (optional)

Blend the watermelon sugar and mint leaves until smooth then add lemon juice and water.

Notes from Sylvia: "What's in this pink stuff? It's pink! I like it."


Thursday, June 9, 2016

Strawberry Oatmeal Cream Pies (Low Sugar)


When I was younger, I loved Little Debbie Oatmeal Cream Pies. Who didn't? It's been a long time since I've had a Little Debbie, but those little, cream-filled cookies bring back some good memories.
Last summer, I started making all kinds of oatmeal cookies. I'm not really sure why, I guess I was just on an oatmeal kick. I ended up making strawberry oatmeal cookies one day and decided that they needed a cream filling. I had made a strawberry goat cheese cake the week before and had some icing left over so I used that and it was a pretty great match! This time I just skipped adding sugar to the goat cheese filling and just used honey goat cheese as is.

I was a little worried that they wouldn't be as good without the extra sugar but I ended up having an accidental blind test that got rave reviews. My dad, who does not eat goat cheese, let me know the next morning that "those cookies are dangerous." I was slightly confused and then he explained that they were "so good he was in danger of eating them all." I answered with, "You do know that's goat cheese in the middle right?" He was very surprised and let me know that it was a perfect pair. If you totally hate goat cheese or like your filling a little sweeter, cream cheese icing will work as well.

Strawberry Oatmeal Cream Pies with Honey Goat Cheese Filling

-1 1/2 cup quick or rolled oats
-1/2 cup flour
-1/2 cup honey
-1 ripe Banana - mashed
-1 egg
-2 tablespoons melted coconut oil
-3 large strawberries - cut into small pieces

-Honey goat cheese or other filling of choice. 

Start by mashing the banana in a bowl and then mix in the egg, oil, and honey. Add the flour and oats to the wet ingredients and mix well. Last, stir in the strawberries.
Spoon onto an oiled baking sheet and flatten slightly to the desired thickness. Try to make all the cookies the same size and shape. Keep in mind that these cookies do not rise or flatten while cooking. They will look about the same going in as they do coming out. Bake at 350 for about 15 - 20 minutes or until golden brown.
Once the cookies are cooled to room temperature, fill the cookies by spreading the filling on the back of one cookie and then sandwiching it with another.


Thursday, May 19, 2016

Quick and Easy Flaky Doughnuts


I'm pretty much on the healthy bandwagon when it comes to most things, but sometimes you just have to eat a doughnut. Although they're not made from scratch, they're pretty good and they're really fast and easy to make. I also like to make them because, although they're still fried dough, I like to fry them in coconut oil which makes them light and crispy and, honestly, I don't feel bad about eating crazy amounts of coconut oil. Maybe I should, but I don't. Also, I can top them with whatever I want, which means that I can limit the sugar I add to them. I mean, if I can't make them good for me, I might as well make them less bad I guess. So whether you top them with sugar or honey or chocolate or whatever else you can think of, healthy or not, these little doughnuts are sure to be gone as fast as you can make them.

Crescent Roll Doughnuts

-1 can crescent roll dough

-Enough coconut oil to fill a small pot approximately 1 inch deep. Basically enough so that the dough doesn't touch the bottom of the pot.

-Toppings or glazes! I used melted dark chocolate, nuts, unsweetened coconut, honey, cinnamon, and *lavender vanilla infused sugar. My favorite ones are when I glaze the doughnut with honey and then lightly sprinkle it with lavender vanilla sugar. It's especially good to crush the lavender buds as you sprinkle on the sugar.


Start by heating your oil on medium heat. Make sure that the oil doesn't get too hot or the doughnuts will burn before they cook through. If the oil is too cool, the doughnuts will take too long to cook and will end up being dense and oily.

While the oil is heating, pop the dough can and remove the roll of dough. Don't unroll the dough, instead cut it into slices and then carefully stretch the dough out from the middle to create "doughnut" shapes.

Carefully place the dough into the oil and flip it over when it turns golden brown, then remove from the oil and place on a paper towel. It should only take about 30 seconds on each side.

Finish by topping your doughnuts with pretty much whatever you want!


*If you've never tried infused sugar, a friend of mine wrote a great post about it on her blog, Willow's Whisk. 

Saturday, April 9, 2016

Eat Pineapple, Be Popular


Eat pineapple, be popular. Ok, so that might not be entirely true… anymore. Pineapple is not only delicious, but it also has many benefits and a rich history. So here are some fun pineapple facts you might not know:

1. Pineapple is rich in vitamin C and contains an enzyme called bromelain which acts as a natural anti-inflamitory. I've heard that if you eat an entire fresh pineapple the night before you have oral surgery, say, getting your wisdom teeth removed, that you won't swell. I wish I had tried that when I got my wisdom teeth out because I swelled up like a chipmunk for an entire week and a half.

2. Growing pineapple takes patience. It typically takes around 24 months from planting to harvesting to get a fresh homegrown pineapple. That's 2 years.

3. Pineapple is historically a fruit of status, friendship, and hospitality. Pineapple was introduced to Europeans in 1493 by Christopher Columbus when he traveled to Guadeloupe. Europeans instantly fell in love with the tangy fruit and it's rarity made it a symbol of wealth and status. In the American Colonies, offering a pineapple to your guests meant giving them the very best, so pineapple later became a symbol of friendship and hospitality. Now, you can find pineapple at any grocery store so it's lost it's honorable glow a little; however, you can still see remnants of it's glorified past carved into the posts of antique beds, statues at the end of driveways, and a variety of other items and decorations.

4. When you think about pineapple, you might also think of Hawaii. However, pineapple is not native
to Hawaii even though Hawaii is the leading pineapple importer to the mainland of the US.


So maybe eating pineapple won't make you popular nowadays, but if you eat pineapple before you get your wisdom teeth out, making you not swell up and look like a chipmunk, then you might make some new friends. And if you then share some delicious fresh cut pineapple with your new friends, you might become more popular.

Click HERE to see my favorite drink using pineapple that I discovered when I had the flu this year.

Thursday, March 17, 2016

Irish Soda Bread


Every year I bring out the Irish in me and make Irish Soda Bread for St. Patrick's Day. And every year I wonder why I only make this bread once a year. I don't know where this recipe came from but it's the one my family has been using for years. This is one of the few recipes that I don't change anything about. It's the best Irish Soda bread I've ever had. I tried using a different recipe one year because, I mean, how different could it possibly be? It was not the same and I will never do it again. This year, I made two recipes - one with raisins and one without.

Irish Soda Bread

3 1/2 cups self rising flour 1/2 cup sugar 1/2 cup golden raisins - regular is fine too (optional) 3 eggs - 2 in the dough and 1 for the egg wash 1/2 cup butter -melted 1 tsp baking soda *1/2 cup buttermilk

Mix all ingredients until a dough starts to form then kneed until everything is fully incorporated. Form the dough into loaves (I got 2 loaves out of one recipe) and place on a prepared baking sheet. Cut an X into each loaf with a sharp knife and then brush with an egg wash. I made my egg wash using one egg and a little bit of melted butter.

Bake at 350 for 30 - 40 minutes or until golden brown.

*If you don't have buttermilk available, you can fake it by adding a teaspoon of apple cider vinegar to the milk. It won't be exactly the same but it works in a pinch!

Happy St. Patrick's Day!


Monday, March 14, 2016

Chocolate Dessert Bowls


My friend, Briana, recently introduced me to chocolate bowls. They were so fun to make and eat that I decided to share them with you! Jordan helped me make our own batch. His dogs were very interested in the process and stayed at our feet the whole time. It's hard to say no to that face, but chocolate is pretty much the worst thing possible for dogs so, sorry, Pip!

Chocolate bowls are really easy to make as long as you follow the rules:

1. Don't apply the chocolate to the balloon when it's hot.
2. Put each chocolate balloon in the freezer immediately or as soon as possible after applying the chocolate.
3. Make sure you get a thick coating on each balloon.
4. Don't over oil your balloons.
5. Don't blow your balloons up to full capacity.

We had to learn these rules the hard way so I listed them out so you don't have to. But no matter how your bowls turn out, I guarantee that they will be fun and delicious!

What you need

Chocolate - I used a mix of bittersweet and cookies & cream
Oil - I used cooking spray
Balloons
Wax paper
Tray or baking sheet
Freezer space 

What to do...

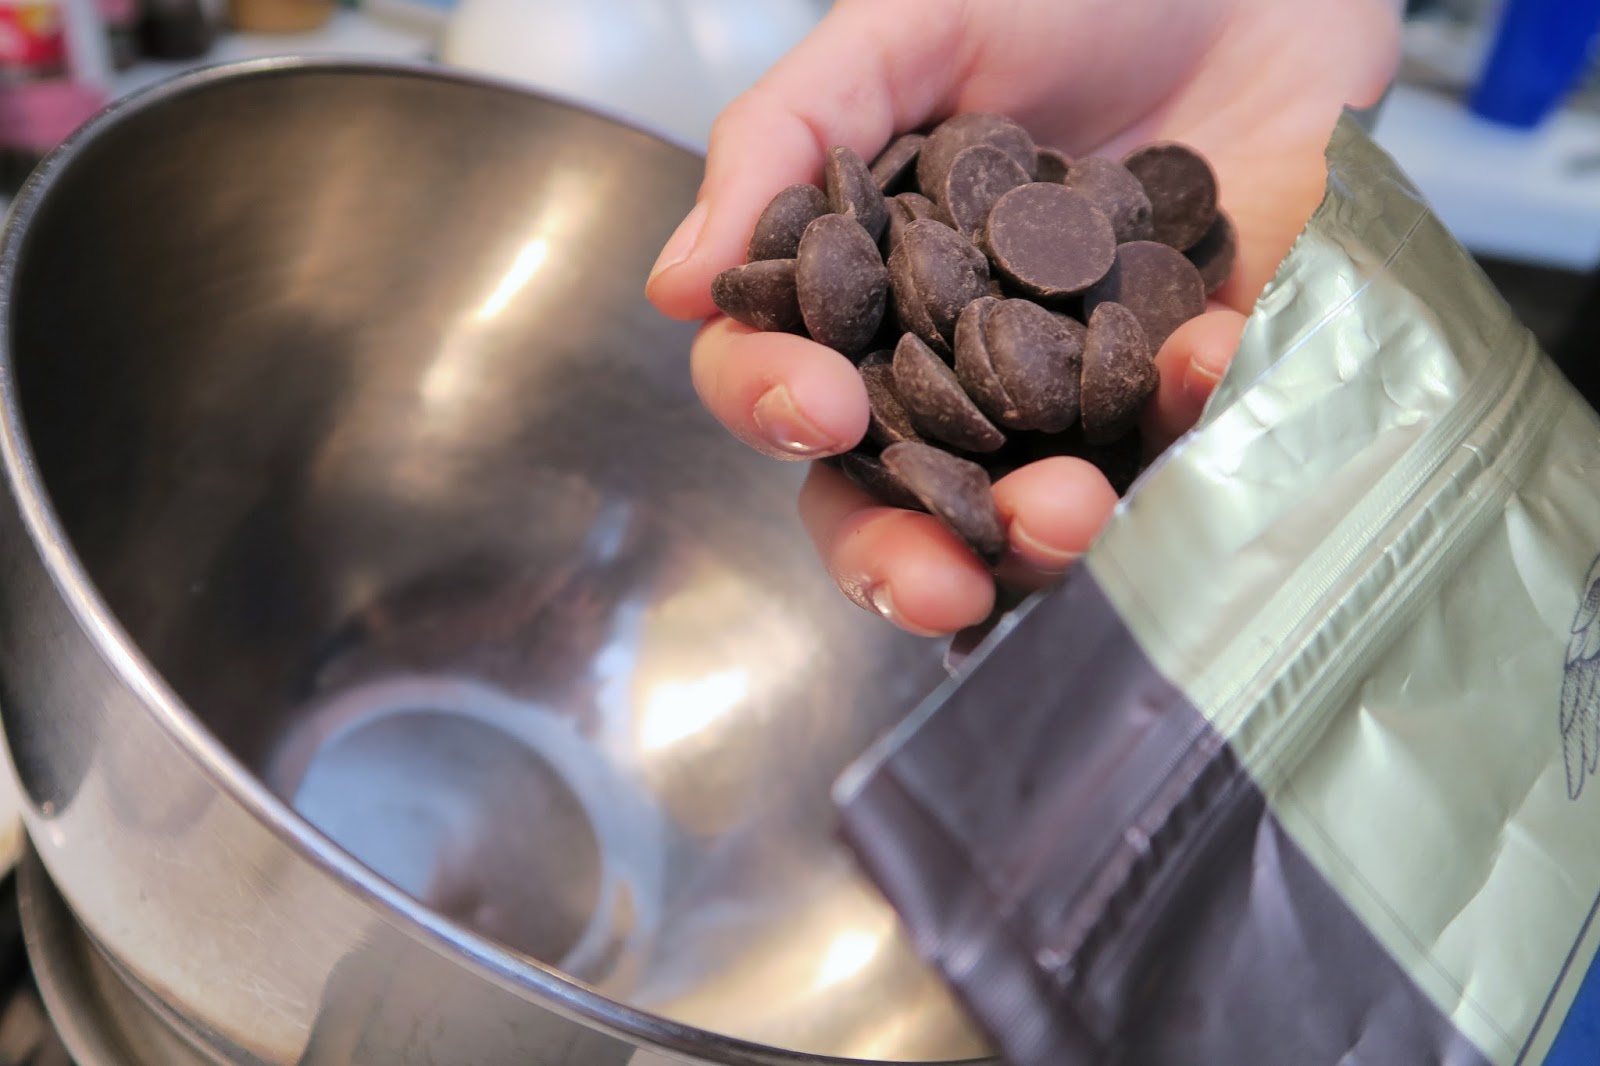
Start by melting chocolate in a double broiler on medium heat stirring often. Remove from heat once melted and set aside. Blow up balloons to the desired size and lightly coat with oil. I sprayed each balloon with a little cooking spray and used my fingers to evenly distribute it. 
Once the chocolate is cooled to room temperature or slightly warmer, use a spoon to coat one side of each balloon and promptly place in the freezer on a tray lined with wax paper. When the chocolate is set, pop and remove the balloons from your chocolate bowls and you're done! Add ice cream and enjoy!

Thanks, Briana!